How to find a rain leak – practical advice from drenched trenches
If you are reading these words, there is a chance you have one and you deserve our sympathy. We will try to help you. As all other materials on this website, this advice is directed to owners and managers of high-rise buildings, as opposed to single family residential houses. It is meant to give you the starting point in often a long and tedious process of remediating rain water intrusion. The process can be categorized in three steps: diagnosis, directions, remediation.
The first step ist also summarized in this instructional video:
[youtube]FtPoj_kEPQ8[/youtube]
Those who cannot see the video in the window may use the YouTube link: http://youtu.be/FtPoj_kEPQ8
#1. DIY.
You probably already directed your in-house staff to find the leak themselves. Most people do not imagine how difficult it can be to locate a leak; therefore, they often approach it with “we can do it” attitude. Experience is not always the kindest of teachers, but it is surely the best. As with all other tradesmen, the difference is mainly in having right tools and acquiring specialized knowledge and experience. What a pro can do in one hour, you can probably accomplish in ten hours, becoming a pro in the process. If this is the chosen path, skip to the bottom where we described the process.
#2. Find a contractor willing to find the leak for free or a nominal charge.
Some subcontractors may be willing to offer the service for free or a nominal charge in expectation of the award of the work. Those contractors found it a good marketing practice, and they count on pure luck – finding an obvious failure, or a blanket replacement addressing the issue, or simply befriending the decision maker and becoming shortlisted for future jobs. Hungry contractors may not necessarily be the best contractors, however, large and well equipped concerns may be not interested in what they may perceive as a too small a job. You may be lucky and find a good startup. Search engines targeted to individuals may be a good start in your search. It works for those parts of buildings which are easy to access. Don’t expect them to be able to access the exterior of the wall of your 20-story tower.
We are talking here about using contractor to find your leak at a nominal charge and attempting a simple repair as opposed to the replacement or alteration. Never ask a barber if you need a haircut.” The experience teaches us that contractors would invariably come back suggesting replacement (as opposed to repair) of some facade component because chiefly this way they can make a profit. Don’t hire them yet. Not before you get a second opinion. This can be compared to hiring a surgeon to perform an open-heart operation at the absence of any diagnosis and directions. The odds of getting better are slim at best, and the imaginary savings would be dwarfed by the cost of the ensuing investigation and remediation.
#3. Replace a suspect assembly.
It’s sometimes less expensive than searching for a leak and may be economical if there is another reason for its replacement soon, e.g. assembly has little technical life left, or it needs to be upgraded to an impact-resistant system, or there is a chance your insurer would reimburse you. Your chances of actually addressing the leak? Rather slim but advisable if you would need to replace the assembly soon anyway. Remember the old saying: “The leak in the roof is never in the same location as the drip.” What applies to a roof, also applies to a building as a whole. Water dripping from a window turns out to come from the roof; while water dripping from a roof turns out to come from the sewage plumbing.
A replacement would be the favorite path chosen by almost all your consultants, including: sales representatives, technical advisors (rechristened salespeople), architects, engineers, contractors, and public adjusters, because they are incentivized in a way not necessarily aligned with your interests, and count on pure luck in addressing the failure. An impeccably dressed and well-outspoken architect would walk in the aura of authority and put some shiny folders on your desk. The choice, she would say, is among the standing seam zinc roof, thermoplastic, and SBS, each of the choices beautifully presented on relevant pretty pictures and charts. This way, the conversation would focus on pros and cons of alternative assemblies, without addressing the reason why the replacement would be necessary in the first place and why the roofing, as opposed, say, to the parapet copings, or terrace floors adjacent to the leak.
Were the question asked, a glib response would ensue describing the numerous deficiencies observed on your roof. Satisfied and intimidated this way, you would fail to inquire further. If you did, you would discover that the roof was observed but not tested, and some other relevant assemblies out of sight were not even observed due to the inconvenient access, such as requiring use of a ladder. This tactics works so well because some owners fail to realize that almost every assembly in their buildings is far from impeccable, and an observant individual may easily put together a similar list of deficiencies justifying the replacement of any other given assembly. It also works well because people prefer to focus on small issues which are easy to grasp. (For reference, see the discussion about the bike shed roof described by C. Northcote Parkinson in his “Law of Triviality.”) This tendency would be well illustrated by laypeople itching to comment, and the names of products used in lieu of general types of systems. “My son-in-law had the AAA-BC roofing installed at his house last year, and he says it’s the best roofing under the sun” will say your secretary. A maintenance guy in his dirty overalls may have enough nerve to ask some irritating questions, such as why the roof moisture survey conducted last year did not show any leaks, but he would be quickly made feel unwelcome by the participants of the meeting, who already set their minds on the new roof, and are unwilling to admit that they did not even attempt to read the nerdy scientific report.
#4. Replace another suspect assembly.
You just replaced one assembly but the leak is still present, in accordance with the “Phelps’s Laws of Renovation:” “Any building component you choose to replace during renovation will prove to be in excellent condition; those you decide to leave in place will be rotten.” At this stage you probably realized what you are facing. You have paid for the material, labor, necessary permits, the clean-up, and the occupants of your building are more than distraught by twice too many months spent living on a construction site, with its noise, dust, swearing, littering, and peeing workers, and a subsequential damage to whatever was in the way, including this vintage collectioner’s piece practically destroyed by an aerial platform’s operator; the damage which you are still disputing with the contractor. Were the subject leak made a distant memory by all this inconvenience, you would probably eventually deem it a high but nevertheless necessary price to pay. However, the leak, larger than ever, just re-appeared after the last rainstorm.
If you are like most owners, you would need to chill down ( a process which takes at least one year) and collect new funds before you would be ready for the replacement of another assembly. This time, it would be said, we found out it was not roofing that was leaking; therefore , we have to replace the wall cladding above the roof. Some sort of tax incentive would be also presented in favor of the scheme, without getting into the details of the calculation of the actual refund amount versus the total replacement cost. Hence, the perfectly sound cladding would end up in a landfill, carried away by a procession of dump trucks. This time, richer with the past experiences, you made the necessary preparations: crated and shipped belongings to a storage, fenced and wrapped the more expensive plants, placed protective boards on floors and paving, and rented an office space on the other side of the street. You emerged indebted but victorious.
#5. The leak survived the replacement? Replace another assembly.
This time, you are better equipped than ever with the new experiences gained during the last round of construction work. Not only you wrapped all, floors, doors, elevators, and the new roofing with OSB sheets to prevent it from damage. You also hired a dedicated construction administrator, and got skillfully prepared set of bulletproof construction documents, to avoid this ugly situation with the mechanic lien stuck on the property title after one of the subcontractors went out of business last time. Your lawyers spent the last year clearing the title, and you just discovered that both sealant and paint have peeled off the new cladding. Not good. However, the good news is that you became a professional construction manager; individuals like you are in high demand and paid the top dollar.
Something in the back of your mind is telling you “Insanity is doing the same thing in the same way and expecting a different outcome.” However, logically speaking, replacing ALL facade components should eventually lead to the elimination of the deficiency, right?
Unfortunately not. It’s is said that the vast majority of failures originate in the joinery between two adjacent facade systems, outside the contractors’ responsibility, and outside of the realm of your average salesperson, technical advisor, architect, or engineer. Therefore, at the end, your contractors and consultants would triumphantly point finger at each other; leaving you with the problem.
#6. What Was Missing?
If you reached that far, you are probably ready to get a building enclosure professional. Chances are that you might never heard about them before.
Originally you probably limited your choices to contractors. Why pay extra and wait for some stupid paperwork, your told yourself and skipped architects and engineers. Let’s get three bids and get it done! This is how it’s often done in the small construction industry with varying results. However, you discovered in the process of construction that there were major differences between you and the contractor in understanding of the scope of the work. It turned out that the price quoted was only for replacement of the roofing membrane, not for the removal of the old membrane, and certainly not for the new flashing, and not for the new thermal insulation required by the city inspector… Your cost ended up to be several times the original bid and you promised yourself to better clarify the desired work result the next time. You suddenly recalled Leslie Nielsen asking the gun-wielding Ludwig “How could you do something so vicious?” in the movie “The Naked Gun – From The Files of the Police Squad?”

Ludwig, who just took Jane hostage responds “It was easy my dear, don’t forget I spent two years as a building contractor.”
So you decided to hire a design professional such as an architect or an engineer to prepare a set of drawings and specifications telling the contractor what, where and how. The price tag made your face flinch, but you told yourself there is no other choice. You received books of neatly prepared and printed documentation and rolls of drawings. You selected a contractor and discovered that the two don’t speak the same language. The contractor just pointed out the size is “totally off” and there is no code-approved system meeting the architectural specifications on the market, then the urgently conference-called architect confirmed that the dimensions were never measured, adding “the owner was responsible for providing a survey.” “This is fine as long as we slope the roof in the other direction,” offered the contractor, followed by the architect protesting a perceived code compliance issue. Contractor followed explaining why architect’s directions are self-contradicting, causing large changes in quantities of materials and labor, and asking for a change order. The architect followed with an updated contract including previously omitted contract administration services. The process of writing checks just begun.
In both examples above, the challenges and loopholes of contracting with construction professionals overshadowed the real issue: there was never any true testing and diagnosis done, the fact emphasized by the re-appearance of the leak after the rain last week. None of the hired parties had incentives and ability to conduct such an investigation. Using the medical analogy, you attempted the coronary operation first at the absence of any diagnosis and direction, then getting directions from an aesthetician. The surgeon bypassed two blood vessels, but you still feel sick. It’s probably the time to get a doctor to listen to your heart and perhaps order a CAT scan and echocardiogram, something what should have been done before the operation.
How to Do it Right.
People ask us about the ropes of the trade all the time. The facade doctor wouldn’t do anything different from what you would do as an DIY (see #1 above). As with all other tradesmen, the difference is mainly in having right tools and acquiring specialized knowledge and experience. What a pro can do in one hour, you (or your in-house staff) can probably accomplish in ten hours, becoming a pro in the process.
A) The process starts with the diagnosis, and the diagnosis starts with observation and testing. You would need to access the entire facade, which typically means having or renting aerial platforms, and some equipment extending your vision, such as boroscopes and binoculars. A review of construction drawings and specifications would help you identify what you see. Once you gained the access, reviewed documentation, and observed the assemblies, you would need to develop a plan for testing on basis of what you saw. Then you would need to investigate the facade by testing assemblies and gradually eliminating those that do not leak. The example of the simplest test is the garden hose test, in which water is sprayed onto a fixed fenestration starting from the bottom up until the leak is replicated, then the suspect areas are masked (e.g. with a duct tape) and re-tested. If the leak stopped, then you are almost done. Testing equipment is typically composed of some plumbing delivering and spraying water, as well as an apparatus generating and measuring air pressure difference, and tools used to identify gaps in building enclosures, such as smoke and noise generators, thermal cameras, etc. How do you do them? There are standard procedures available from industry associations, such as AAMA and ASTM describing how these tests should be performed, but you would end up modifying them anyway to make them work on your case. The results you would be getting may be quite confusing for someone unfamiliar with the design and construction of a high-rise buildings. Unlike small residential houses, large buildings are seldom alike, therefore their illnesses can be inferred only by a person familiar with both general construction and having extensive experience in high-rises. In some cases the results would be elusive, so you would need to install a monitoring equipment to collect and log moisture data over a prolonged period. E.g. a water alarm correlated with a weather report may allow for a discovery that the leak becomes active only when the wind comes from north directions. Very often you may need to make exploratory openings in your building in order to get closer to some areas while testing. Needless to say, these openings would need to be temporarily secured once you are done. There are some tests which are best left to professionals, such as all tests where large hydrostatic pressures are involved, such as flood testing of flat roofs and rain water leaders. There are many things that may go wrong: a roof deck overloaded with water may collapse, and the pressurized plumbing may suddenly burst sending shrapnels around.
B) The second part of the process is the remedial design. Now you need a facade doctor to write a prescription or a referral to the surgeon, so you would be able to tell your contractors what, where and how needs to be done in order to get competitive bids. This is similar to hiring an architect or engineer, except you need this person to be knowledgeable and experienced in the building enclosure rehab, and in the nuts and bolts of the specific assembly identified as deficient. This is the most challenging part of the process, and well characterized by the law of adverse attraction: the quality of the advice would be in adverse proportion to the willingness of the adviser to give it, starting from your neighbour and your wife’s cousin. You will suddenly recall the old saying: “The person with the least expertise has the most opinions.” The trouble of telling a good advice from a bad advice is that their results may only differ in durability. This is why we bet you’ve been already told to use remedial coatings and sealants. Why? They would almost always offer at least several months of service: enough to get the job signed-off and collect a check. Russians say: “Paint it and sell it.”
The solution should embrace the issues holistically, address the characteristics of the existing materials, compatibility of components, differential movements of the building and assemblies, applicable building codes, feasibility, and provide a system protecting the interior of the building not only from the water, but also against all other external adversary forces: wind, water vapor, impact, fire, wildlife, etc. The resulting set of drawings and specifications should be based on detailed survey, and contain a sufficient detail to confer the general intent. It typically requires making exploratory openings in your building to verify how it was built, if this step was not performed while testing. Remember that once you accept this set of documentation, you would become responsible to the contractor for its accuracy (See the article about Spearin Doctrine). A good practice is to have a second pair of eyes review the set. Just like you would do in the medical world, you want another doctor to give a second opinion.
C) The repair, replacement, or alteration. This is the time to get some anesthesia to numb the shock of the incoming invoices. You will hire a general contractor and relevant subcontractors to perform the work, using the documentation from the facade doctor. How do you know if they don’t discover some new conditions after the demolition begins? How do you know whether they actually properly prepared the substrate before squeezing the sealant in joints? You don’t. This is why you need a facade doctor to ocassionally watch over the contractor’s shoulder, help him clarify the situation, and report to you any discrepancies between the contractor’s obligations and the actual work. Remember that everything on a construction site is an experiment, and you don’t want such a risk. Therefore, whenever an assembly installation begins, you need the contractor to build a mockup exemplifying the intended procedures, materials, and effect, and you need the facade doctor to test this mockup to avoid surprises. Such a test is also advisable periodically as the construction progresses. The process described above is nothing new. It’s called building enclosure commissioning, and two industry associations are currently developing national standards addressing it.
Congratulations! Now it’s time to sit down and wait for the next rain with the high expectations stemming from the pleasant feeling that everything what could be done has been done right.
Read more about rain water leaks on our webpage www.Facade-Doctor.com/leak.html. You can also watch our 30second long video http://www.youtube.com/user/FacadeDoctor#p/u/3/d_KSoFw_lRA [youtube]d_KSoFw_lRA[/youtube]

 Condensation Risk Assessment
 Facade Access
 Facade Engineering. How To Design a Functional Building Enclosure
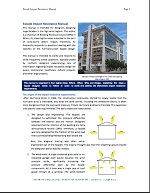 Facade Impact Resistance Manual
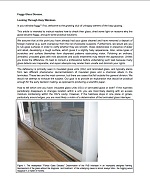 Foggy Glass Disease
 How To Write and Read a Forensic Report
 Movements and Tolerances
 Review of Curtain Walls, Focusing on Design Problems and Solutions
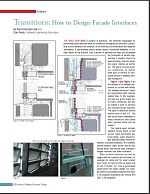 Transitions: How to Design Facade Interfaces
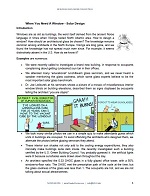 When You Need A Window – Solar Design
Leave a Reply
You must be logged in to post a comment.