Building Enclosure Consulting

Facade Doctor

Forensics

We help in identifying phenomena responsible for symptoms related to moisture and glazing, by providing expertise and diagnostic tools. We help in evaluation of casualty & property damage.

We collect data in the field, conducts field observations, performs quality tests, causation and condition assessments, performs simulations of failures, and recommends remediation procedures and materials. We also contribute the knowledge and experience to solve disputes among parties of construction process and serve as an expert witness.

Kaz was involved in major forensic investigations in the South East region of the U.S., providing assistance in evaluation of property damage. He is skilled in cause-and-origin investigations and analyses, like-kind repair analyses and estimates, separation of the pre-existing damage, and building code analyses. He specializes in architectural glass and glazing: (i.e. curtain walls, skylights, windows, and glazed doors). Thoroughly familiar with insurance adjusting and a past holder of the Florida insurance license.

As a forensic expert, he investigated high-profile cases, such as the collapse of the monumental skylight in Embassy Suites hotel in Hunt Valley, Maryland, the tornado damage to the Georgia Dome, Georgia World Congress Center, and CNN Headquarters in Atlanta, Georgia, and wind, flood, fire, and smoke damage to the Oakwood Center Mall, New Orleans, LA.

Typical Scope of Services:
  • Assistance in evaluation of casualty & property damage
  • Cause & origin investigations/analyses
  • Remediation design
  • Preliminary cost estimates
  • Like-kind repair analyses
  • Review of building documentation
  • Code analyses
  • Building-code violations
  • Identification of standard of care
  • Risk management analyses
  • Due diligence audits
  • Ownership transition (take-over) assessments
  • Underwriting assistance
  • Negotiations with contractors
  • Air, water, thermal, and structural testing
  • Construction dispute resolution assistance
  • Pre-existing conditions evaluation
  • Failure, damage, wear and tear evaluation
  • Depositions and court testimony

We conduct cause & origin observation and analysis, as well as determination of code requirements with regard to the repairs and alterations of grandfathered buildings. We separate damage from pre-existing conditions. We perform like-kind repair analyses and preliminary cost estimates, particularly in those areas which are known to be poorly covered by standard estimating tools such as Xactimate, such as the architectural glazing. We understand the language of insurance policies .

Field Testing

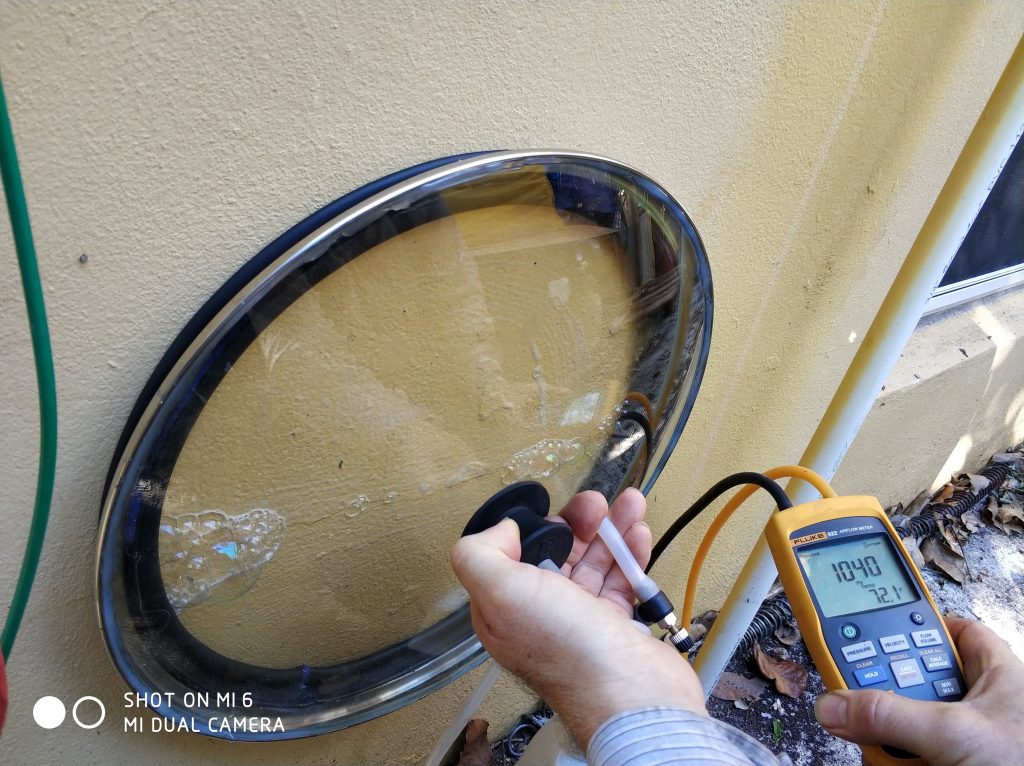
We perform and witness physical tests in the field to identify potential deficiencies and their sources. We normally follow procedures established by major industry associations and Florida Building Code. We also develop custom tests and modify the equipment to address specific field conditions. We calibrate our testing equipment before each test. We also offer calibration service for other field testers.

The most typical tests include:

  • Thermal imaging of building envelope assemblies, by ASTM C 1060 “Standard Practice for Thermographic Inspection of Insulation Installations in Envelope Cavities of Frame Buildings,”
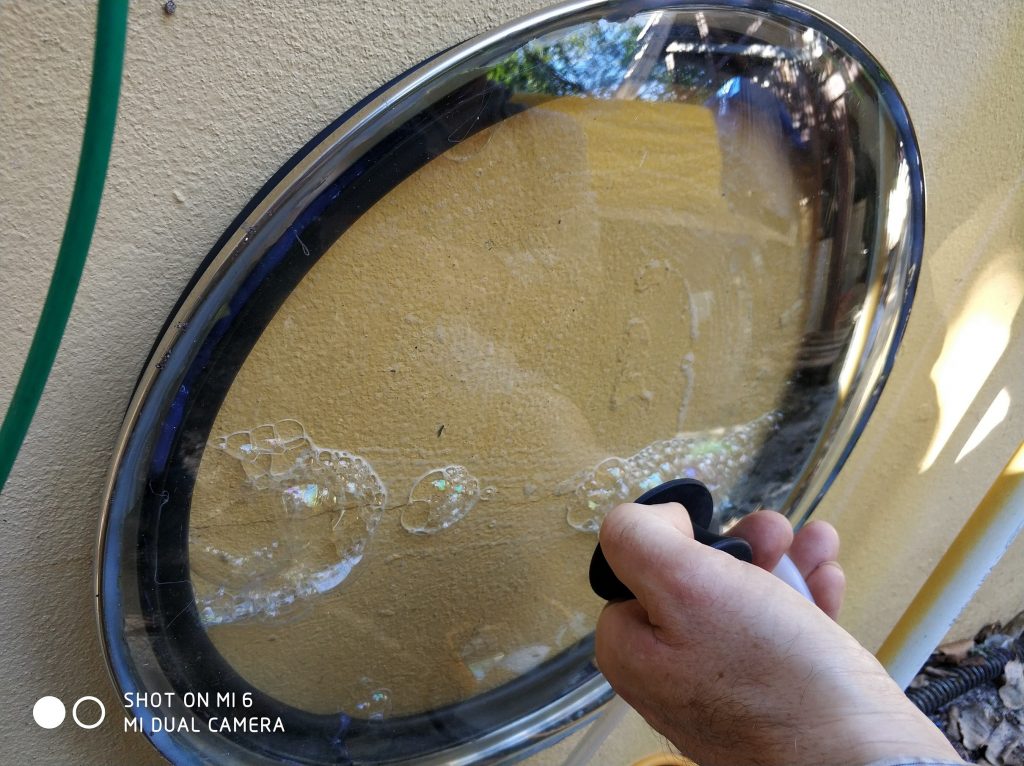
  • Water and air tests for diagnosing cladding and fenestration leaks:
  • ASTM E1105 “Standard Test Method for Field Determination of Water Penetration of Installed Exterior Windows, Skylights, Doors, and Curtain Walls”,
  • ASTM E783 “Standard Test Method for Field Measurement of Air Leakage Through Installed Exterior Windows and Doors,”
  • AAMA 501.2 “Quality Assurance and Diagnostic Water Leakage Field Check of Installed Storefronts, Curtain Walls, and Sloped Glazing Systems,”
  • Thermal imaging for wet materials, insufficient or wet insulation, and air leaks, following the ASTM standard C1153, titled “Standard Practice for Location of Wet Insulation in Roofing Systems Using Infrared Imaging,”
  • Hydrostatic pressure (flood) tests for roofs and waterproofing ASTM D5957 “Standard Guide for Flood Testing Horizontal Waterproofing Installations,”
  • Hydrostatic pressure tests for storm drainage and other plumbing leaks following IBC and FBC plumbing code,
  • Wind field uplift resistance tests for hurricane winds following TAS 114 and 124,
  • Non-invasive roof wetness evaluation using capacity, infrared, and nuclear testing,
  • Glass evaluation and measurements of scratches and other potential blemishes and deficiencies,
  • Window and door framing evaluation and measurements for straightness and other potential deficiencies.
  • Air leakage tests using “blower door” fan pressurization ASTM E779, and ASTM E 1827 “Standard Test Methods for Determining Airtightness of Buildings Using an Orifice Blower Door,”
  • Smoke tests for air and water leaks,
  • Acoustic tests for air and water leaks.
  • Borescope (narrow scope camera) investigations of concealed spaces such as the air gap behind cladding (also including sewer camera tests).
  • Sealant pull tests by ASTM C1193 “Standard Guide for Use of Joint Sealants,”
  • Coating pull tests by ASTM D 4541 “Standard Test Method for Pull-Off Strength of Coatings Using Portable Adhesion Testers,”
  • Glass VLT and SHGC measurements in the field,

Construction Defect Investigations

We provide takeover assessments and construction defect observations and analysis. We review building documentation, verify code compliance with the code in effect when building was permitted, and identify applicable standard of care. We present our findings in a way understandable to laymen. We also provide architectural restoration design and reserve studies. The interested reader may be interested in our complimentary article titled “How To Write and Read a Forensic Report. Review of Typical Issues and Solutions Associated with Engineering Assessment Reports.”

See also our GALLERY OF CONSTRUCTION DEFECTS discovered in course of Building Enclosure Commissioning.

Forensic Reporting

The interested reader may be interested in our complimentary article titled “How To Write and Read a Forensic Report. Review of Typical Issues and Solutions Associated with Engineering Assessment Reports.”This article is intended for education and amusement of both authors and recipients of reports describing deficiencies of building enclosures. It may also prove useful in other areas of expertise, as number of issues are fairly universal. Also, we have a printable scope of forensic services. (PDF, size 73 kB) available for download.

Why we Fight Leaks.

Moisture-related deficiencies are by far the most widespread, and therefore we developed a dedicated line of leak detection services for high rise buildings.

Hiring a contractor to fix a leak is like getting a surgery without diagnosis first. Hiring an architect to design a fix is like getting a catholic priest to teach Kama Sutra. Ask us how do we know.

We diagnose leaky buildings to find leak sources and give you a prescription for the repairs, saving you much money and aggravation in the process. We not only use specialized equipment, we also have experience with hundreds of faulty buildings, which helps us to devise strategies of leak finding.

Below is the video commercial:

Many managers and owners ask us for help after they spent considerable amount of time and money chasing leaks to no avail, and after everything else has failed:

-”home inspectors” misidentified the source of leaks,
-expensive repairs and replacements did not address the problem and turned out to be unnecessary,
-contractors blamed other contractors,
-engineers showed up without a flashlight,
-architects recommended a blanket roofing replacement,
-the corporate insurance adjusters drove by, snapping out-of-focus pictures of your property from a window of their car, then denied your claim in the excruciatingly obscure language,
-”experts” brought by your public insurance adjuster mistakenly investigated a wrong building, and eventually admitted that their skills, education, and experience has little to do with real estate.

All these parties claimed to be the true experts in the field, but somehow they offered the initial investigation free of charge or at a nominal fee, and left you with a distinct impression that the real reason of their visit was different…

You might have also experienced the following annoying scenarios:

-original designers made you sign a covenant not-to-sue in return for the copy of the original construction documents,
-the lawyers defending you in the “slip and fall” claim sent you the first “excess”bill,
-a bodily injury claim caused your insurance rates to go up,
-a ridiculously inflated claim filled on your behalf by your public insurance adjuster caused your insurance agent stop returning your phone calls,
-a distinct, musty smell makes your customers and guests suspect the personal hygiene of your employees.
-the occupants of your building complain about stuffed noses and teary eyes, some of your employees took a prolonged sick leave…
-first “mold and mildew” subpoena showed up.

Please, do not call us unless you have already experienced at least few of these options because you are probably not determined and motivated enough yet. Our services are not cheap, but our clients can tell you that they are worth it. We come highly recommended.

We typically are hired when hundreds of thousands of dollars have been already spent on repairs and alterations but failed to mitigate the problem. The costliest and longest investigation Kaz ever joined had already incurred costs well in excess of $1M and was just approaching its second anniversary.

Facade Access Advantage

We specialize in high-rise facades characterized by a challenging access. We own rigging equipment ready to access your facade, saving you thousands of dollars right at the start. Most other experts don’t own the necessary equipment and require you to pay for services of a contractor or charge you extra for a rental.

Facade Testing Advantage

We specialize in complicated cases which often require miscellaneous field testing. We own testing equipment, again saving you thousands of dollars right at the start. Most other experts don’t own the necessary equipment and require you to pay for services of an additional testing firm or charge you extra for a rental.

How Does It Work?

THE PROCESS

We typically strive to achieve two goals:

1) Replicate the leak you normally experience during a rain. This is typically a prolonged and tedious process during which we systematically identify suspect areas, access them using various alpinist techniques, spray or flood them with water using fairly specialized equipment to monitor the conditions, such as pressure differential across the building envelope. At the same time we need to see inside some assemblies which may conceal the active leak (e.g. walls and roofs); therefore, we access them with boroscope, via exploratory openings, or try to deduce their configuration using combination of experience, review of the available documentation, and technology (e.g. thermovision).

2) Temporarily stop the leak. Once we replicate the leak, we still need to identify specifically which component of the building is responsible for the water intrusion. The area sprayed with water is typically quite large; therefore, we let it dry, mask the suspect joints, and spray again until there is no water getting in.

In majority of cases, there is more than one source of leakage, Therefore, we leave the seal on, and ask you to report any subsequent leaks to us. The process is repeated if there is another contributing leak source.

THE RESULT

At the end of day you are left with:

1) Sources of leaks identified and temporarily sealed in anticipation of future repair by a contractor of your choice. We typically use the duct tape which should hold for a while.

2) Conceptual repair drawings and specifications, including discussion of pros and cons of alternative repair options (e.g. a cheaper Band-Aid approach, versus costly corrections of inherent errors of building design).

3) A detailed engineering report that you may use to request funding from a responsible party.

4) A detailed invoice including the timesheet with descriptions of the performed tasks.

THE RISKS

Would my leak ever be found? We considered ourselves the best equipped and most knowledgeable party out there, and we have never failed so far. However, we are perfectly honest and humble on this point: There is an inherent risk that the source of your leakage would never be found, regardless how diligently we work to lower this risk. If you consider us, you probably heard the opposite from all the parties that you hired before.

At some point it simply may become impractical to disassemble half of a building to get to the core of the problem. However, we should be able to identify such a risk in the early review of construction documents and tell you about it.

A separate problem is whether it would be feasible to fix, and the answer is sometimes no. A good example is the hotel building Kaz investigated many years ago, where the source of ugly streaks on the facades turned out to be a widespread failure of hundreds of waste pipe connections run inside concrete precast slabs. The waste traveled horizontally inside the core channels of the concrete slabs and discharged at the ends of concrete planks. The repair would require either a substantial amount of demolition or an installation of a bypass plumbing within the limited space.

The more frequent risk is the weather becoming a schedule buster. We typically need a dry condition in order to perform the testing. Frequent rains may interrupt the testing and cause the need to come back again.

“All Good Architecture Leaks.”

“If it doesn’t leak, then it’s not Architecture.”

“All prize -awarded buildings have multiple defects.”

“Whenever I see a news headline about the new LEED certified building, I send unsolicited proposals for forensic services to its owners.”

“If the roof doesnt leak, the architect hasnt been creative enough.”

This and other quotes should help you realize that your designer’s goals may be different than yours. The attitude is quite different, as may be derived from architectural comments regarding above quotations (after the paper All Good Architecture Leaks.”" authored by var Hardarson, PhD) :

“(…) this phrase could be interpreted in a positive way for the architects, implying that inventive architecture was particularly prone to construction defects because when borders are traversed, room is created for new architecture and eventually new technical solutions.”

“(…)when this phrase was uttered, the speaker often added that this did not necessarily mean that houses with leaky roofs were examples of good architecture.”

We love architects because they create lots of business for us. We often conduct rainwater intrusion investigations, particularly in high-rise buildings, characterized by a challenging access and expensive components unfamiliar to most designers and contractors (such as curtain walls).

Regardless whether it’s your house, your company, or your country, the first impression of your guests is probably important to you. Musty odor, puddles of water on a floor, buckets, towels, “wet floor” signs, and stains darkened by microbial growth may spoil this impression.


Visual Air Barrier Testing

Air flow through building enclosures is supposed to be controlled. It typically follows that all exterior assemblies such as walls, roofs, and transitions need to be practically airtight, with exception of dedicated air vents. Lack of air tightness often may indicate other deficiencies: water leaks, water vapor convection, transmission of odors, insects, insufficient noise resistance, etc.

Air tightness verification requires two things: the differential air pressure and a tracer. The former is a prerequisite, and is unfortunately the most difficult to accomplish in field testing. We generate it by installing door fans, switching AC fans, and scaling down to specific location by building pressurized chambers, and sometimes, if we are lucky we got wind from just the right direction. The trace can be heat, smoke, trace gas, etc.

Beauty of the “Bubble Gun” test is that it’s portable, with the equipment very small, fitting the average carry-on case. The chamber is typically a small cone or dome made of transparent material (Some pros use acrylic or polycarbonate domes, I use a glass lid stolen from our kitchen, don’t tell my wife, she is still looking for it.) fit with a perimeter gasket, and a micromanometer gauge. The tracer is any sufficiently viscous liquid, preferably easily washable and compatible with the materials of the facade, such as soap water or dishwasher fluid (I happen to use a dedicated concentrated bubble solution).

Its testing procedure and equipment is described in ASTM E1186, among other things. After the chamber is sealed to the wall, air is pulled slowly enough to prevent bubbles from breaking (at the maximum rate 25Pa/sec). This kind of a very low vacuum is best controlled by slowly sucking air with one’s own lungs, but in the 21st century we use a portable vacuum pump. The rate of the vacuum buildup is controlled with a valve and a watch (there is also the bubble gun on the market with electronic controls, which is a nice tool, but seems to be an overkill for such a simple function). Soap water is spread on the wall in such a way as to not introduce any bubbles, but I haven’t found any better way for it than by a brush application, which always leaves some surface bubbles.

First bubbles are infused gases released from the thick soap solution, (just as they show up in a laminating resin when the vacuum is pulled) which we disregard, then the wall starts responding by releasing air through voids and imperfections. These bubbles are much larger and keep coming as the pressure is pulled, so it’s easy to tell them apart.

We mark these bubbles and we are done. It’s a practical “show and tell” test; the wall either passed or not. There is no way to measure the air tightness, because the allowable air flow would be below threshold of any gauge that I know about. If there is a bubble, it is reasonable to assume that the material/system would leak in excess of the 0.0004/0.004 cfm/ft2 thresholds.

Challenges. The testing is used to assess only the typical flat surface, as opposed to e.g. material transitions. The most typical testing cases would be a liquid-applied WRB, and these are often installed on very rough surfaces, which may successfully resist sealing the chamber’s perimeter, which in turn may need to be additionally sealed with some goop (e.g. chewing gum) or several additional hands pressing the perimeter gasket.

Practical considerations: The chamber is pressed against the wall by squeezing of the thick and very elastic perimeter gasket in order to seal the chamber to the wall. Any reversal of such a movement introduces large and abrupt pressure variations. Therefore, one needs to be careful not to accidentally release the chamber, as the vacuum increase caused by even a minute drop of hand pressure is far in excess of the standard-prescribed 25Pa/sec threshold, and may cause breaking of bubbles. Fortunately, the test can be repeated ad-infinitum.

Air pressures. Most barriers are rated at 75 Pa ( 1.57 psf ) which is useful for comparison among different materials and assemblies, but not so useful in individual cases. The typical wind pressures for low and mid rise buildings fall somewhere in 40 psf (1,915 Pa) range, while taller buildings or those located in coastal areas may easily see over 100 psf (4.788 Pa) of negative wind pressure.

Some installations are so bad that they do not need any testing. If the substrate is visible through gaps and voids, it’s a good indication that air would not stop just because your contractor said so. The prerequisite of all testing is to fix all conspicuous deficiencies first. Inexplicably, we would be asked to test them anyway.

Also, some building walls are built either without any dedicated weather resistive barrier (WRB) or they confusingly have two or more layers. The former is typical for thick concrete walls, which designers often believe that their thickness is a sufficient weather defense (as in the photo below, where heavy leaks were observed inside). Testing these walls may need a different technique, as the air pulled at such a crack can and probably comes from the adjacent crack, along the line of least resistance.

Tips and Tricks of The Trade. What is in your wall and roof and how to test it on your kitchen table? Best things in life are free. Kaz shares these tricks with designers and owners who are often unable to obtain physical characteristics of samples of brand new materials they consider using. In many cases all you need is a cup of hot beverage. 

This material republished here is brought to you by Building Enclosure Institute, the Florida Non Profit Corporation.

Comments Off on Visual Air Barrier Testing

Typical South Florida Wall

The typical thermal insulation that I see in brand new buildings in South Florida (hint: I only see sick buildings) consists of layers of paper or plastic film and aluminum film. It’s found behind the interior sheet rock. The thermal performance is very prone to field installation quality, and we saw large thermal discrepancies in the field. We collected several samples by tearing them off the wall here and there, and decided to see how they behave moisture-wise.
The manufacturer of the most commonly installed material of this kind has not shared the relevant testing reports with us, in spite of numerous requests over many years. Only the results are available.

We verified it the way we normally advise architects to test samples of interior materials: by placing it over your cup of hot beverage, and covering it with an empty cup.

It’s a quick test, as you would typically get results in less than a minute. It’s also scalable: if you have enough patience to measure the temperatures, time the test, and weight the collected condensate, you would obtain the exact permeability values, and if you repeat it several times to be sure, your numbers would be as good as those from the accredited/certified lab.

In most cases you would be testing unrated materials (e.g. good luck getting permeability number of an interior carpet from their supplier) that are intended for installation on the interior of the enclosure. If your carpet is intended on a floor over an unconditioned space, you’d need to select it coordinating with the other layers and climate: in Bahamas it needs to be permeable, not so much in Alaska.

One layer is covered with aluminum film. This thermal insulation is supposed to block thermal transmittance in radiant mode, which requires metallic surfaces for low emissivity.

The top cup remained clear. No surprises here: the aluminum film is vapor impermeable, just like an aluminum foil used to wrap meals in our kitchen won’t let any flavor to escape.
(We chose liquor glassed because its the most transparent, and otherwise the photo wouldn’t be clear enough, but you can use any vessels. And, no, we don’t drink at work.)

The other layer is made of paper, which is glossy on one side, as you can see here by the light reflection.

The top cup remains clear. This paper is also vapor impermeable, at least in the short term. The results so far confirm the permeability number given in its specification sheet: 0.018 perm (practically a vapor barrier).

Is it water permeable? We gave it a try, by cutting a circle, placing in a filter holder. Water dripped freely, even before pulling air from the flask below.

Conclusion: It could be a moisture trap. Per the manufacturer, this material was supposed to be installed continuously, fit snugly, stapled and taped tightly, without voids and interruptions (we have yet to see it installed that way). If this material were installed that way, it would block the inward vapor drive in hot and humid climate. However, since it’s typically installed improperly, we don’t see moisture damage behind it, but its thermal properties vary. But how many owners commission the building enclosures and order thermal studies of their houses?

So what’s in front of it? The outer layers of the typical wall we saw in front of it were either a cast-in place or a plastered masonry concrete wall.
(If you are unlucky, it’s a frame wall with a home wrapping paper around it, and if you are really unlucky, it’s EIFS.)
They are also typically void of any vapor barrier, much less any WRB (weather resistive barrier). Whenever I asked designers why, they typically responded that it’s enough that it was coated with elastomeric paint.

Concrete walls are also typically cracked, due to missing or inadequate differential movement compensation. (Want to embarrass an American architect? Ask them to draw your facade tectonics: the pattern of control and movement joints on elevations.) Cracks may differ from those visible across the street, to the invisible ones, for which one needs a bubble gun to find them. An elastomeric paints, regardless how many layers, won’t bridge those cracks. You would need a dedicated, thick “condom” (several dedicated products on the market, typically made with silicone) which we typically recommend to our clients for remediation of such hopeless cases; their cost is significant, and it’s definitely better to avoid the need for their use in the first place.

Here is the ASTM E1186 bubble gun testing of such a case, revealing air bubbling through a cracked bed joint of a CBS wall. (It’s coated with at least five layers of elastomeric latex paint.) Many buildings are like this, and historically it didn’t matter, because these are thick walls that were allowed to dry. However, circumstances changed: building interiors in the hot climate are now cooled, less vented, and interior layers of walls are impermeable more often than not. It should be no surprise that buildings also became sicker.

One of the manufacturers of this thermal insulation probably came to the same realization, and now they are also selling a perforated version of this material for those (probably rare) cases where it’s installed properly and moisture entrapment may become a problem. Perforations still don’t make it a good thermal insulator, unless it’s meticulously installed.
Bottom Line: It’s the cheapest rated thermal insulation that we know of. If you use it, you’d need a very anal retentive QAQC in the field, which would make it much more expensive. Otherwise, you may need to rip the walls open later just as we did when we got these samples.

Tips and Tricks of The Trade. What is in your wall and roof and how to test it on your kitchen table? Best things in life are free. Kaz shares these tricks with designers and owners who are often unable to obtain physical characteristics of samples of brand new materials they consider using. In many cases all you need is a cup of hot beverage.

This material republished here is brought to you by Building Enclosure Institute, the Florida Non Profit Corporation.

Comments Off on Typical South Florida Wall

Sample Reports

Although not all our work results are documented in writing, reports generally give a good example of what we do:

All identifying information was blacked out.

Comments Off on Sample Reports

Energy Monitoring


ac pulse

This is the power measurement taken from a 3 ton central AC condenser in South Florida for one day. It’s a nice snapshot of an AC pulse, expressed in electrical current per time.

For mathematically challenged: after multiplying the number of amperes showed on the vertical axis by ~230 volts (not shown here), we arrive to approximately 3,200 Watts of power. This is equivalent of  320 led bulbs rated at 10W (equivalent of old incandescent 100W light bulbs). For comparison, there are 16 bulbs used to lit my house.

So, in other words, every time this unit goes off, we could just brightly lit 20 houses with the power used by this air conditioner, not counting the interior air handler which adds approximately 3 brightly lit houses.

If you read my recent post on HVAC zoning, you may now get the big picture: this single wall thermostat is not just turning a whole house on. It is akin to turning lights in 23 houses.

It’s responsible for ~1/3-1/4 of the total energy use in an old house with  uninsulated walls and windows, which in this particular case translates into approximately $700 a year.

It is also a good signature for health diagnosis of the system. Aging compressor? Inadequate refrigerant charge? It can be read between the lines.

How can you measure it? All it takes is a current transducer and a datalogger.  I am still paying off the loans which I took to purchase the professional equipment, but you can do it for much less. As I am slowly learning programming microprocessors, I discovered how relatively reliable and inexpensive became sensors which we can use for home monitoring: temperature, pressure, humidity, light, current, voltage, movement, smoke, water, CO2, and CO sensors to name a few. Most can be had for approximately $1 if one is patient enough to wait two weeks for them being shipped from China, and occasionally held by customs a little longer. These are good quality brands such as Bosch, and they can be installed redundant to reduce risk of defective ones.  Many come bundled, such as the temperature and humidity sensor I used in my experimental setup to drive a servomechanism of an AC diffuser.

current monitor

current monitor

Most residential dwellings are very similar in their functions, and can be sensorized, pre-wired, and programmed later with several repetitive options, as the total cost of materials would account for less than $100, with copper cables being the most expensive part. Commissioning would become a lifelong experience, all parameters would be continually monitored, and systems fine-tuned to achieve a comfortable and energy efficient configuration. Purchase decisions would become more educated, based on facts and hard data, as opposed to marketing claims.

Imagine, for example, that you live in this building in South Florida built recently and therefore thermally insulated. Your monthly electrical bill is twice your neighbor’s, and there are dark spots of microbial growth on AC registers. What would you do? I know people who spent thousands to get air samples collected and lab tested, and then  spent thousands more to litigate against contractors. Others may spending hundreds on a wireless, voice recognizing, smart thermostat system, or whatever else was marketed as a state of the art panaceum at the time. Unfortunately none of these would bring you closer to solve your existing problems.

However, with the monitoring,  all you would need to do is to have a look at your charts, or to program the software to issue reports of any irregularities and possible improvements. You would perhaps notice that the temperature sensors located in the forced air ducts show the supply air is repetitively below the adjacent ambient Dew Point, perhaps explaining those dark spots on your registers. High temperature readings in the attics may partially explain the irritating energy bill, and high humidity and low pressure readings coming from sensors on your exterior walls would explain the musty odor. What musty odor? You became too acquainted to notice it any more, and your guests are too nice to bring it to your attention.

So, how come every new house does NOT come fully equipped and pre-wired for automation?  Someone smarter must have figured it all out by now? However, if you look at the offering of the marketplace, it’s mostly irrelevant, unreliable, and self-contained. Congratulations, you can control lights in your dining room with a smartphone, and it only takes six or seven clicks, as opposed to simply flipping a wall switch. And you spent several hours with a customer’s support to troubleshoot the system and accomplish this admirable feat!

Houses don’t come pre-wired, and therefore smart home systems are designed and sold as wireless, which makes them fundamentally unreliable. If you live in a single family house like me,  you may not realize how literally crowded is the air. I didn’t, until I used my radio-controlled drone and a WiFi GoPro to remotely inspect exterior walls of a high-rise building. Two-way communication was lost in two floors height, roughly after 20 feet. A Wi-Fi replicator helped, but needed to be dropped on a rope to be approximately half-way between the observer and the device. These are challenges of wireless devices. Trust me, you don’t want to deal with them every day.

How do you wire a house with an existing forced air system? I just read a blog describing an admirable DIY method, which involved sending a parachute up the ductwork. The parachute was sent from the hood of an air handler, and it was made of a plastic shopping bag, pulling a fishing mono-filament, which was then used to pull the required 22 gauge cable for the servo controlling the register and for the psychrometric sensors. Whoever invented it was a genius. We need more of them.

Comments (2)

Negative Pressurization in Hot and Humid Climate

This is a two story building with an air handler placed downstairs. This configuration results in negative pressurization of the lower floor in range of 10 Pascals. Unfortunately, this is actually a quite typical condition in hot and humid climate, achieved by combination of factors, such as unbalanced exhaust fans and other HVAC errors and omissions.pascals termites

Why do I write about it? The measurement was made at the entrance door. The frame of this entrance door could be disassembled with bare fingers – all that was left was an intact paint coat supported by fins of wood growth rings. The rest of the wood was eaten away by termites in a couple of years. It’s a result of sucking hot and humid air around the door perimeter into the cooler environment, creating moist conditions perfect for microbial and insect growth. In this case it was termites, which ate away the untreated wood frame components, made of the average poor quality soft wood sold in home improvement stores under the name of fir-spruce-pine.. They left a pressure-treated wooden buck intact, which indicates the need for pressure treatment of all wood components installed in hot and humid climate.

Leave a Comment

Cladding Spalling

Facade Collapse

Facade cladding collapse as a result of corrosion of reinforcement. This kind of failure can be detected by safety inspections, which are mandatory in few jurisdictions. Source Fishki.net.

Leave a Comment

UAV (Unmanned Aerial Vehicles) in services of the facade inspector.

Unmanned aerial vehicle can be used for facade inspections - Facade Doctor LLC

Unmanned aerial vehicle can be used for facade inspections.

Inspecting building facades is a risky business. I hang hundreds of feet above a ground on a rope thinner than my finger. Also, big overhangs and tall skylights are often not accessible at all. This is why I modified a popular remote-controlled toy drone to adapt it to the challenges of our trade. I have not heard of anyone else using unmanned aerial vehicles for forensic investigations of building enclosures, so i had to start from the scratch, by extending its range of flight, and adapting its sights.

(Read the rest of this entry…)

Leave a Comment

Tools of the Trade – Photographic Equipment

curtain wall anchor

Picture is worth a thousand words: a curtain wall anchor with twisted serrated washers. (Twisted washers don’t offer sufficient wind resistance).

Picture is worth a thousand words. A good picture can also save a lot of nerves. A good photo of a construction defect or a facade failure is self-explanatory and often cuts unnecessary disputes before they even start. This is why I consider a camera to be my primary tool of  the trade.

Apparently, the photos illustrating my field reports stand out on their own, because one of the most often asked question I hear is “how did you take this photo?”

Several clients asked my advice on buying the photographic equipment, and I thought is would be good to share pro publico bono the one I gave recently. Here it is, below.

(Read the rest of this entry…)

Leave a Comment

Dew Point Analysis and Monitoring

The dew point meter in the exploratory opening and in the exterior wall affected by high humidity damage to interior millwork

It’s not always rain leakage, we find in our investigations as facade doctors. We sometimes find no traces of water intrusion, as opposed to water condensing inside, where it can damage moisture-sensitive materials, and contribute to microbial growth i.e. mold and mildew. In such a case, (Read the rest of this entry…)

Leave a Comment

Thermal Stress Analysis


freeze-thaw failure of decorative rod connections on aluminum curtainwall facade

Freeze-thaw failure of decorative rod connections on a brand new aluminum curtainwall facade.  The  defect affected approximately 10,000 connections.

One of the chief reasons of weatherproofing failures of facades is the thermal stresses and associated movements in excess of  seals’ elastic capacity. This is particularly true for metal curtain walls, because of (Read the rest of this entry…)

Leave a Comment

Cause and Origin Determination

Forensic investigation of a collapse of a large section of glazing.

Forensic investigation of a collapse of a large section of glazing.

We assist adjusters and attorneys in evaluation of casualty & property damage. We conduct cause & origin observations and analysis, as well as determination of code requirements with regard to the repairs and alterations of grandfathered buildings. We separate damage from pre-existing conditions. We perform like-kind repair analyses and preliminary cost estimates, particularly in those areas which are known to be poorly covered by standard estimating tools such as Xactimate. We are experts in architectural glazing, which is the frequently misrepresented area in our experience. We understand insurance policies language, having insurance adjuster’s training. We also peer-review work of others.

The interested reader may be interested in our complimentary article titled “How To Write and Read a Forensic Report. Review of Typical Issues and Solutions Associated with Engineering Assessment Reports.”This article is intended for education and amusement of both authors and recipients of reports describing deficiencies of building enclosures. It may also prove useful in other areas of expertise, as number of issues are fairly universal.

Download the printable scope of forensic services. (PDF, size 73 kB)

Leave a Comment

Construction Defect Investigations

We provide takeover assessments and construction defect observations and analysis. We review building documentation, verify code compliance with the code in effect when building was permitted, and identify applicable standard of care, and building reports. We assist with construction claims. We present our findings in a way understandable to laymen. We also provide architectural restoration design and reserve studies. The interested reader may be interested in our complimentary article titled “How To Write and Read a Forensic Report. Review of Typical Issues and Solutions Associated with Engineering Assessment Reports,” pertinent to civil construction industry.

See also our GALLERY OF CONSTRUCTION DEFECTS

Construction Defect Investigations

Comments (1)

Spectrophotometric Simulations

Glass is seldom matched properly, as seen on the photos below, and therefore owners often require a blanket glass replacement, after only few pieces have been broken or scratched.

Glass is seldom matched properly, as seen on the photo

Save hundreds of thousands of dollars which would otherwise be spent on replacement of the intact old glass not matching the new replacement glass. (Read the rest of this entry…)

Leave a Comment

Spontaneous Microbial Growth in Winter.

What can be more challenging in the Hot and Humid Climate than a steamy August? A steamy winter. Life of a building scientist in South Florida has two distinct seasons: Steamy and steamier. We recognize them because we get two different types of calls:

1) around August we get calls from desperate people who (as turns out after our subsequent investigation) typically suffer from “vapor retarder on the wrong side” syndrome; and

2)  in a winter we get calls from folks who typically suffer from ” missing winter humidity control ” syndrome.

The present winter is not different in South Florida thanks to the record high temperatures couple of weeks ago. We had some scattered rains which keep the relative air humidity up in eighties. And the telephone keeps calling. Regardless whether a caller complains about a bad floor, roof leaks, or window leaks, or black soffits stains, sick cat or sick children, we may correctly assume it’s the missing winter humidity control, and we can price our visit accordingly without much risk of running over budget.

The slides which illustrate the effect of high air humidity are quite startling for many attendants, judging by sounds coming from the audience when I show them during my seminars. They show microbial growth on many surfaces, and I copied one of them below. If you see mold and mildew like that in a winter, there is a good chance that your building may suffer from this disease. High air humidity in the building is the second good indication.

The reason for such a condition is the (Read the rest of this entry…)

Leave a Comment

Vapor Retarders in The South

This time of a year in the South, we experience very high water vapor pressures, manifesting itself by miscellaneous moisture problems of mysterious nature. Do you feel uncomfortable, your printers and copiers fail to print, envelopes glued themselves together, steel is covered with a thin layer of rust, wood delaminated and bowed, pests overrun the place, and the musty odor explains why your employees are on a sick leave?

There are many possible reasons, but this time we would take the vapor retarders under a magnifying glass. Why? Not just because of the steamy August behind our windows, but also because this subject is so simple and easy that it would make me look smart enough in comparison.

Have you ever wondered where the vapor retarder should be (Read the rest of this entry…)

Leave a Comment